Friday, June 6, 2014

1 look- 3 lipsticks


I've been on quite a lipstick kick. Maybe its summer and all the bright colors it has to bring, but I've been loving experimenting with new colors and different finishes. Its easy (for me at least) to feel like I have to keep the rest of my makeup simple if I'm wearing dramatic lipstick, but I wanted to play around with a full face of makeup and see how adventurous I could get with my lips too.

The other day I did a pretty classic smokey eye with a nude lip like usual. But then I started thinking about switching things up, and went from a nude lip, to a bright red, then to a black lip all within a few minutes. Its surprising how completely different a look can be when you just change your lip color!


First with a nude lip:


Then a red:


Lastly a black (with a touch for gold- because why not?):


Its crazy how lipstick completely transforms a look: from classic, to glamorous  to punk. Which is your favorite?

Products used:

Face-
Maybelline Fit Me Concealer in Fair
Essence All About Matte powder
Wet'n'Wild Color Icon blush in Pearlescent Pink
Elf Bronzer in St Lucia

Eyebrows-
Avon Glimmerstick in Blonde

Eyes-
Avon Eyeshadow Primer
Wet'n'wild Vanity palette
Wet'n'Wild Greed palette
Urban Decay Naked 3 palette
Elf Long-Wearing Lustrous cream shadow in Toast
Avon Liquid liner pen in Black
Jordana Best Lash Extreme in Black

Lips-
(Nude) Elf matte lipstick in Nearly Nude and NYX Butter gloss in Eclair
(Red) NYC lipstck in Retro Red
(Black) Avon Supershock liner in Black, NYX Macaron lipstick in Chambord and Elf Long-Wearing Lustrous cream shadow in Toast. 

Did you know I have an instragram account? Follow me at psalm397_makeup!

Tuesday, June 3, 2014

Color for the Every Day

We've all done it: Bought a fun, bright and colorful eyeshadow palette, bought it home, held it like our "precious" and then wondered what in the world we're going to do with it. Wearing a bright purple smokey eye is great for a special occasion, but its not practical or even appropriate for most days. So, how can you use the bright colors you love so much in everyday life? Take a look at these ideas for inspiration!

1. Add a pop of color to your inner tear duct-


This is a perfect time to pull out your lighter, brighter colors like yellow or light blue. A dot of color in the inner corner adds a lot of interest without looking to over the top. Just be sure it avoid colors that have red undertones- colors like pink or red in the inner corner can give a 'sickly' effect.

2. Smokey color under the lid-


Wear this with a simple eyeshadow on top, and this is where you can pick a color and let it shine! Purple, green, blue, turquoise, any color that once again wont make you look sickly. You can really blend the color down as low as you feel comfortable- just make sure you avoid harsh lines. Keeping it soft allows you to use that bright color without it overwhelming your whole face.

3. Soft wash of color around a smokey eye-

Often we think of smokey eyes as all neutrals, but adding a little bit of color can add an extra special spark. Here I used a soft pink shadow to blend out a pretty traditional bronze smokey eye. The key to this is using a matte color if possible- because shimmery colors blended to far up on the lid can be a little dated.

4. Colored liner-


There's no need to spend a ton purchasing a bunch of different colored liners. Just make your own! Any color, and almost any eyeshadow will work. I used a drop of Elf's Lock and Seal to my liner brush, and dipped it into a loose eyeshadow pigment to create this green liner. You can do the same thing with eye drops as well. If you're using a pressed eyeshadow, be careful to either dip your brush on a corner of the shadow (as water can damage the shadows finish), or pack the shadow onto the brush and then wet it.

5. Color in the crease-


This is probably the easiest way to wear color every day. However you wear your normal eye makeup, you can just layer a little bit of color in the crease for added depth and interest. Any color will work, especially if you keep your other shadows neutral! Here I used a burnt orange- but you can just as easily use purple, red, green, blue... the list goes on and on!

So what are you waiting for? Pull out those bright shadows and start incorporating them into your daily makeup routine! Who knows, maybe it will spark some creativity and you'll combine a few of these ideas together for a totally unique and bold look!

Friday, May 23, 2014

1 Lipstick 3 Ways

Bright lipstick is always in for summer. So you go out, buy the brightest color that strikes your fancy, bring it home, and wear it once. Maybe twice. Then it sits on your counter staring you in the face until winter when bright lips seem out of place.


 So how can you get some more use out of that summery color? Here are some ideas!

1. Wear it as blush.

Lipstick (especially creamy formulas without sparkle) are ideal cream blushes. You can apply it two ways: rub some from the bullet onto the back of your hand and then swirl a synthetic brush in the lipstick and apply lightly to your cheeks. You can also apply to lipstick to your fingers and then rub it into your cheeks. The key is to make it a light wash of color.

2. Use it as a cream shadow.


It might be a bit out there for some, but using lipstick as a cream shadow is a great way to bring a bold statement to your eye look. Of course, you can also try lighter lipsticks if you want a sheer wash of peach or creamy pink. The key to using lipstick on your eyes is using a eyeshadow primer underneath and to set the lipstick with a shear wash of eyeshadow to ensure it doesnt crease.
DISCLAIMER: Most lipsticks are not approved to use around the eyes, so use it at your own risk. When using lipstick on my own eyes, I just keep it away from my waterline and tear duct area.

3. Wear it as lipstick (Duh!)


OK, I'm not trying to be smart here. All of us have bought a lipstick because we love the color but have felt strange wearing it in public because it screams "LOOK AT MY LIPS!". Summer is the perfect time to get over that fear and just go for it. Orange, purple, pink, fuchsia, blue, green- whatever! Wear it to the pool, to the store, on a date or to church. Why not? Whats stopping you?


Products used:

Face-
Loreal Magic Nude Liquid Powder foundation in Light Ivory
Maybelline True Fit Concealer in Fair
Milani Statement Lipstick in Flamingo Pose

Eyebrows-
Avons Glimmerstick in Blonde

Eyes-
Wet'n'Wild Vanity palette
Physicians Formula Black Gel liner
Jordana's Best Lash Extreme Mascara

Lips-
Milani's Statement Lipstick in Flamingo Pose


Products used:

Eyebrows-
Avon Glimmerstick in Blonde

Eyes-
Two Faced Shadow Insurance
Milani Statement Lipstick in Flamingo Pose
Wet'n'Wild I Dream of Greenie palette
NYX single shadow in Chic
NYX single shadow in Red Head
NYX single shadow in Kiwi
NYX single shadow in Exotic Green
Physicians Formula Black Gel liner Jordana Best Lash Extreme Mascara

Tuesday, May 13, 2014

Growing out a pixie cut: in between hair styles

Anyone who's grown out there hair- whether its from a pixie cut, a short bob or even bangs, knows the growing out process is not fun. You spend 50% your time trying to figure out how to get your hair to grow faster, and then the other 50% trying to camouflage the awkward in-between stages while you wait to reach your goal.
Whether you realize it or not, there is a lot you can do with your hair while its growing to help with the painful process.  From headbands to braids, styling your hair in the growing out phase is essential to sticking to your guns and braving through the gawky stages. Here are some inspiration for styles you can try while growing out your hair from a pixie cut. Obviously I'm not a hair authority, so there are a million more things you could try. But these are just a few that worked for me.

1. Headbands 

Keeping my hair off my face
Where it all started


I started growing out my hair in Feb. 2010. It was very short and incredibly damaged, and there wasnt much I could do with it besides style it the way it was cut. So I started throwing headbands in my hair every chance I got. Plain ones, decorated ones, whatever matched my outfits and mood. It didnt change the fact that my hair was short, but it helped me feel like I was able to have a few options besides my plain pixie. 

2. Embracing your natural texture


Over the course of growing out my hair, one of the easiest ways to change my look was to go back to basics and let my curly hair be curly. It was hard, especially when you're hair is very short, curly hair can feel like you're walking into Golden Girls territory. I felt like the secret for me was to diffuse my hair with a blow dryer to add lift, while keeping my hair smooth with gel. It helped keep my hair bouncy and shiny without looking like a poodle.

3. Pull your hair back.

butterfly clips for a baby poof
Bobby pin central


Curly and pulled back
Whittle bitty ponytail


Slightly longer pony and a headband

Even if your hair is to short for a ponytail (like mine was in the first picture), you can play with pulling it back. Pull back your bangs, or create a poof at your crown with butterfly clips. Experiment with what works for your hair. Once my hair was long enough I pulled it into baby ponytails a lot. Maybe it looked silly, but I was proud that it had finally grown long enough!
Another option is to use bobby pins, and lots of them. When your hair is short it can be hard to get a bobby pin to hold anything back, but with a little practice, you can create some cute styles. A little hairspray and texturizing spray can help keep pieces that are to short under control.

4. Change your part. 


Its a simple thing, but makes a big difference. Changing your part can add body and lift if your hair is a little flat, plus it can help hide awkward layers as they grow.

5. Try some braids
My meager braiding attempt

Admittedly, I'm not very good at braids. Now that my hair is longer I'm getting better- but when my hair was short I was rubbish. I wish I had played with braiding more when my hair was short- its such an easy way to spice up your bangs or create a pretty half up do. Use some bobby pins to pin short hairs in place if they arent long enough to stay in your braid.


6. Learn how to pin curl. Seriously. 

My first failed pin curl attempt
After finally getting the hang of it!

Pin curls seem intimidating, but they actually are quite easy. I learned from watching youtube turtorials (a good place to start is here and here.) Once I knew the basics, I did pin curls all the time on my short hair. Pin curls dont have to give you a super vintage feel either- you can really use the basis of pin curls to create volume, soft curl or full on Shirley Temple head.

Obviously the longer your hair grows, the more you can do- but dont let the length keep you from having fun. If you like wearing hats or scarfs, rock those on days you feel like your hair needs a little help. Dont focus to much on your desperate struggle for long hair and enjoy the time you have left with short hair. Play with it. Do things you always wanted to do but never had the guts to do before. This is your chance- so go for it!


Read my other posts on growing out your hair!

Growing out a pixie- Two years later!
Growing out a pixie- update
In-between hair styles and update
Growing out a pixie cut

Wednesday, April 16, 2014

Growing out a pixie: Two years later!


 It's been two whole years since I decided to grow out my pixie cut, and its safe to say I've reached the other side. In fact, I've gone through at least 3 cycles of cutting my hair in a pixie, and growing it back out over the past 10 years or so. They say hindsight is 20/20, and after looking back through pictures of my hair during this last transition, I thought I'd impart some wisdom for those who are thinking about or in the throws of growing out their pixie cut. 

Before you read on, know that I'm not a hairstylist, nor have I received any professional training. All of these tips are ones I learned through the school of hard knocks and lots of research on the good ol'internet. If you have any reservations about applying these tips, go to your hairstylist and ask them first! Also, there is no sure fire steps you can take to make your hair grow faster. Genetics and your overall health are huge factors when growing your hair, and everyone's hair will grow at a difference pace. Once again, ask your hairstylist if you have any reservations! That being said, here are a few tips!

1. As I stated back 2 years ago in my original post about growing out my pixie cut, there were several steps I had to take in order to get my hair healthy enough to grow past the length it was. Looking back, the main thing that made a world of difference was putting down the bleach. As much as I loved the bleach blonde color, it was destroying my naturally dark blonde hair. It was breaking off every time I washed it and felt like straw. Dying it a darker blonde and applying protein treatments every few weeks stopped the breakage and allowed my hair to finally grow.

The start- Feb 2012: bleach blonde and DAMAGED!
March 2012: Darker and on the road to health!


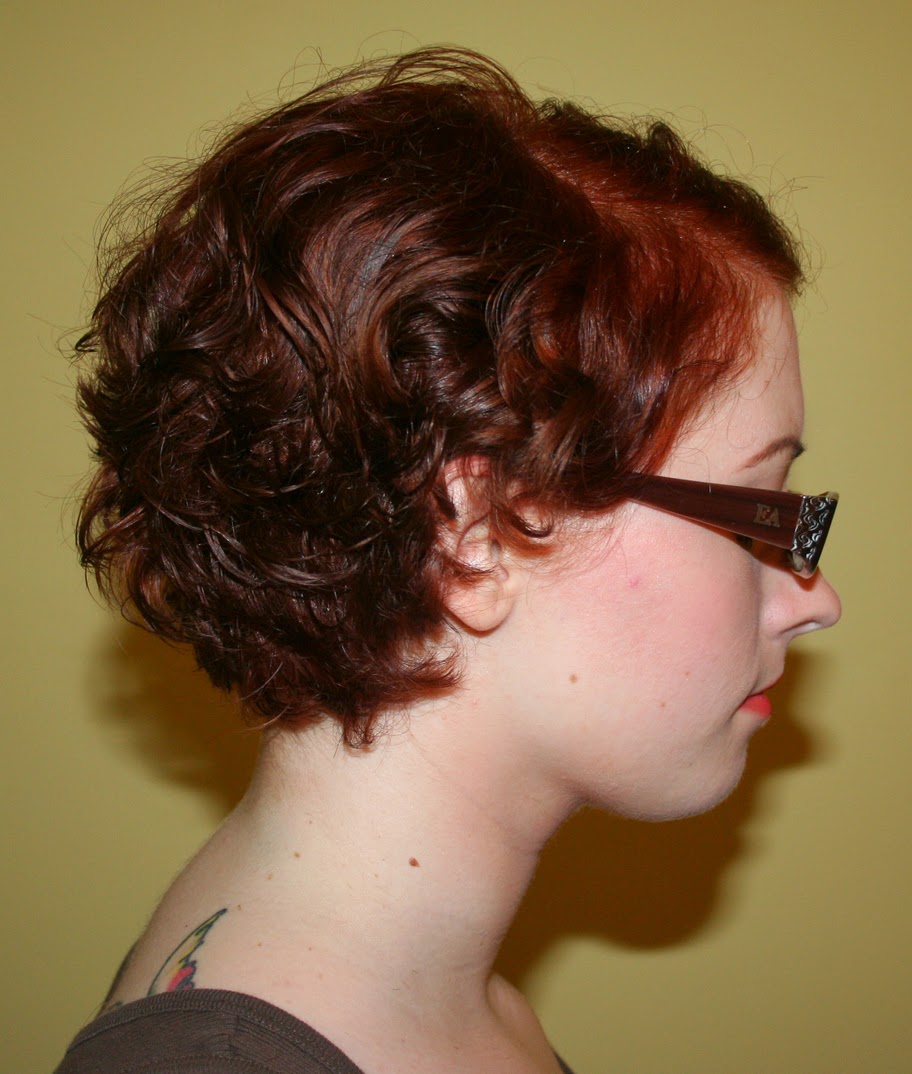
2. It took quite awhile to get to the point I was comfortable with it, but putting down the flat iron made a big difference. Take it from me- my natural curl is frizzy, flat, and all around not cute. But, after some experimenting, I was able to find ways to bring out my curl without looking like a poodle. Part of that was learning how to do a classic wet set pin curl (which sounds harder then it really is). I watched a few great videos (watch some of my favorites here and here) that gave me the basics to start setting my hair and it did wonders.
Now that my hair is grown out, I still only heat style on special occasions. I think its been over 6 months since I last blow dried or flat ironed my hair.  One day when I have the time I might pull out my flat iron just to see what my hair looks like totally straight, but for now I'm having a lot of fun finding new styles that are easy and healthy for my hair.

October 2012- Straightening every day
November 2012- Embracing heat free curls


3. To be completely honest, part of the reason my hair grew fairly well was because I got pregnant in November of 2012. From my understanding, pregnancy hormones can cause some women's hair to  grow faster and stop falling out. This is exactly what happened for me. My hair became thick and grew like a weed. Taking prenatal vitamins also helped my hair tremendously.

That being said, obviously you aren't going to get pregnant just to grow your hair out. So, how can you help your hair grow faster?
    • Take you vitamins! Obviously you need to consult with your doctor before taking new vitamins, but prenatal vitamins and biotin can help your hair grow in healthy and strong.
    • Eat healthy! Your hair is directly effected by what you put into your body, so take care of yourself!
    • Stop getting so many trims. Trimming your hair every 6-8 weeks just continually cuts off the length you've obtain. I know, every hairstylist and their Mom says differently, but its a myth that trims help your hair grow. Your hair grows from the top of your head, not the ends, therefore trims will not promote hair growth. What trims do it cut off any split ends, which helps avoid the split ends from going up the hair shaft and potentially breaking the hair. So, if you are diligently taking care of your hair (avoiding heat and excessive styling, eating healthy, taking vitamins, etc), you shouldn't have as many split ends.
      That being said, obviously, get a trim if you notice damage or need your hair shaped. Nobody wants fried. split ends or a mullet while growing out a pixie! As a rule, I usually get my hair trimmed every 4-5 months now that my hair is grown out.
April 2013- deep in the throws of pregnancy
September 2013- 1 month after giving birth

4. Stop stressing and enjoy the ride! Growing out your hair is frustrating and often feels like it will be a million years before you can get your hair into a ponytail, let alone past your collar bone. But, with the caveat of a medical condition, your hair should eventually grow. So enjoy playing and experimenting with your hair in the mean time. Buy some fun accessories, clips and bobby pins and go to town. You can do a lot more then you realize!
I plan on doing a post about in-between hairstyles later, but until then, here are a few pictures for inspiration!

May 2012- little baby ponytail!
July 2012- curly and pulled back

September 2012- braided sides and pinned back

So, after all is said and done, would I cut my hair into a pixie cut again? Yes! Like I said in the beginning of this post, I've cut it into a pixie several times over the years. I LOVE pixie cuts, and think if you want to try one, you absolutely should! Right now I'm so glad to have long hair. I love being able to pull it up into a ponytail, braid it, experiment with different types of buns, or just wear it down. I'm sure sometime down the road I'll cut it all off again, and when I do, I've got the tools to know how to grow it out gracefully!


April 2014- my current length in heat free curls


Are you growing our your hair, or have you grown it out in the past? Do you have any tips that helped you get past the awkward stages? Comment below and tell me!

Find my Pinterest hair inspiration board to see some of my current and past hair loves!